Monday, October 29, 2012

Steampunk Halloween!


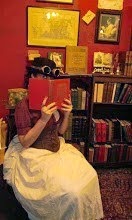
Well this was a crazy sprint to a Halloween costume.  I used a Truly Victorian pattern to use the bottom of the pattern to make a overskirt.  I added antiqued jump rings and steampunk findings to make it interesting.

I also bought welding goggles from a welding supply shop then painted them with craft paint which really isn't the right paint but I used a matte sealer to make sure the paint doesn't paint chip off. Here some photos, the costume theme was vampiric steampunk:


The waist cincher was way too big.  I will try to rework it and add a correct from busk while cutting down a few of the side panels.  I can get quite a bit of reduction but this wasn't going to do it for me.
Boo!
Here are the finished goggles, below is exactly what they looked like new:

Wednesday, October 24, 2012

Steampunk Halloween in 2.5 days - Arrrrgh....


I finished the corselet and am annoyed beyond belief.  This really wasn't the end all be all but I did want to do some pretty serious waist reduction.  Given the sizing on the pattern this should have been 4" smaller than my waist.  When I cut the muslin it was HUGE! (see prev post).  I then took a ton off the the edges and it still ended up being too big.  I can lace all the way closed (see partially closed back pic).  I am telling myself it is just a Halloween costume, but I'm disappointed because I know the look I wanted was easily achievable but didn't happen.....grrr....


I used a front flap because I used hooks and eyes and not a real corset busk.  I didn't have time to get one because I wasn't planning to sew and this was "just" a Halloween costume.  I will order a real busk and probably rework this so I can get a more reduction from it.


Construction note:  this project required the teflon foot and leather needles which made everything work beautifully.  However when I went to set the corset grommets the punch I use to prepunch holes didn't like the fabric at all and kept jamming and sticking.  Thankfully I got my trusty awl out and that helped.


Sunday, October 21, 2012

Steampunk Halloween - in 5 Days: PART I


A friend has enticed me out to play the weekend before Halloween.  The Bay area has a lot of fun dress up parties, and San Francisco becomes one big costume party regardless of what party you are going to.

So how do I do something new in less than a week.  I started by trying to dye a thrift store steampunk shirt.  It was one of those great super-cheap super-perfect tops.  It also fit without having to tailor it.

I washed and dried it then sank it into a strong tea bath.  The white turned a nice ivory, the blue/black stripes really didn't change....and the "oh geez" moment came when I realized that the unseen discolouration in the armpit areas took the tea more than anywhere else...so I had tea-armpit stains.  It only got worse when I tried to bleach the shirt out.  Apparently there was a pair of pink yoga pants in the wash unbeknownst  to me.  I could do nothing except watch the pink tinged water slosh around.

In the end I picked up a bag of terracota-brown dye which worked perfectly.  I then added some metal look buttons (sorry for the crummy photos)....and presto! for $6 I have a perfect steampunk shirt....


Of course I can't stop with just a thrift store shirt.  I needed a corselet -- so I thought I'd sew one.  An easy peasy one from Simplicity's steampunk line.  I picked up some .99cent patterns and thought it would be a good base, boy was I wrong.  I'm not sure why but I cut the pattern based on the "after tightening" measurement and it came out way way too big.  You can seen the pattern piece below (this includes the seam allowance) and the pink marker where the new seam lines are:


So what I thought would be a no-brainer project turned into a couple of hours of fitting, mocking up, and fitting again.  I am also short waisted so I had to take that into account as well.

I used pleather to get what I hoped would be a cool steampunk look.  Of course I didn't have the appropriate busk laying around so I fiddled up a closure with hook and eye tape, and maybe at some other point I'll add a real corset closure.  It just needs to get me through the weekend festivities.

The most important new thing I had was a teflon sewing foot (bargain on ebay) this allowed me to sew the pleather easily, something I didn't have when I made a costume a few years ago and vowed never to sew with the stuff again.
Since the stuff shows pin marks I also used painters tape to help mark and hold things on while I was sewing, and totally cheated, since this was a bargain last minute project, I used my handy dandy industrial zip ties for boning.  I'm not done with the project but should be in a day or two then I will post a final product.


Thursday, October 18, 2012

Sewer's Block....ugh...

I cannot! I will not! No!..There is nothing left in me...


Has this ever happened to you? I think that I am deeply in the throws of it...sewers block.  I believe it began with the  Evil Yellow Dress Project....I was....hmm....just not that inspired.

I am sewing at the moment, but I'm not SEWING.  From time to time I am asked to do children's costumes.  I'm working on a Brave dress.  It is easy, boring yet time consuming.  I was inspired by the book dress, and now I'm not.  Halloween is coming up and my general belief is that it should be a national holiday.  We should have the day off to prepare our costumes and the following day to recover from our reveling.  This year I have made nothing novel, and am staring at various fabrics and patterns completely unmotivated.  Nothing in the costume closet sparks enough enthusiasm to even purchase a Halloween event ticket.  Bla!

How do I get my mojo back?  Any suggestions?


Sunday, October 14, 2012

Soiled Doves or Victorian Show Girls -- a Little of Both? What do you think?


This was the final score in my little thrift boutique treasure hunt.  This is the first cabinet card of this kind that I have ever owned.  Everyone else is always so proper in their photos.

I looked up the studio but couldn't find any reference to it.  The address in San Francisco is now the International Art Museum of America, but the original building at that address was destroyed in the SF 1906 and rebuilt in 1907 but then redone agai.

Who are these women with ankles and striped stockings showing?  Matching polished cotton petticoats, with fancy shirtwaists that are a little sheer.  They look to be wearing corsets, have pompoms around the bottom of their vests, and coins sewn onto the collar of their shirts.  They have their hair out.  And it is making me crazy that I can't tell what the standing one is holding in her left hand.

I'm thinking they are some sort of stage act, and I can't quite pin down the year, although I'd say it was maybe mid 1880s if I were to guess.  What do you think?


Oh What a Haul!

Ok, it is only a tiny haul but I'm so excited to share.  I will post photos later but I found some wonderful bits on Saturday.  I had a few rare hours alone to run some errands and thought I'd stop off at an annual pumpkin boutique put on by one of the local thrift shops.

I was disappointed as I walked around as many things were antique store priced.  I did find a few interesting and very inexpensive bits randomly as I walked (and dug) through bins.  Then as I walked around with my treasures I heard an announcement that it was now 1/2 price time! Whoo hoo! I was able to find three great photos, one early 1870s or maybe late 1860s of a great gown, a postcard from San Francisco of what I figure are "professional" women or stage actresses/chorus girls from the 1880s, and a fab early 1860s head shot of a woman with a hat that turned out to not be a paper photo but possibly a tin type.  I also was able to get a wonderful petticoat that is in great condition for about the price of a venti latte, and two (what I believe to be) 1860s fashion prints professionally framed from a shop in Oakland (according to the stickers on the back). Photos soon....I promise.

Update 10/14:


 Here are the two fashion plates.  Unfortunately, when they were framed the dates were covered up.  Since they were professionally framed in Oakland before 1960, I am not going to take them apart at this point to see the dates - safely assume 1860s.  The shop that framed them is no longer in existence but the family who owned the shop was heavily into the arts/antiques/galleries from what I can tell via Google searches.


 Then this photo which is on paper glued to a large oval which has a nondescript photo of a little boy on the other side, was another super bargain bin find.  There is writing in pencil that says" Mrs. J.M. Miller....something I can't read....and 65.   1865 would be fairly correct if one was looking at her clothing:


My latte priced petticoat is really interesting.  I was tickled that there are no holes or stains, and the four glass buttons are probably original, however, it has so many alterations to it I can hardly tell what is going on.  It was shortened by adding a tuck in two places, then above the eyelet there is another band of fabric basted on, but what is really interesting to me is the opening.  None of my other antique petticoats button in the front.  It looks like the petticoat was adjusted to fit over a rump pad or even a small bustle.  there is a dart in the center back that was put in as well as a horizontal tuck mid tush, with small gathers right below it.  I just am puzzled about this....what do you think?


Tintype beauty -- I was so thrilled, when I took this out of the baggie it was in I discovered it was a tintype!  Sadly the paper jacket is torn and stuck to the tintype as well.  The picture is so clear, and she is so beautiful -- dark hair, light eyes, and an amazingly fab hat.  It was the hat that caught my attention.  However, when I photographed the tintype I realized her bodice had such wonderful embroidery on it....an added bonus.  The large hoop earring is also something that we might not think as fashionable, but this beautiful woman was fabulously put together!


Tuesday, September 18, 2012

The 1880s Book Cover Dress

Project Update:
11/08/12

I'm coming out of my sewing funk...I had fun with my five day steampunk project and now I'm sewing bow ties.  I've started the Book Dress with a mock up using the Truly Victorian bodice, but I've made changes to how I cut the pattern -- I will discuss that more below.

I made some changes in how I want the final product because I realized I really didn't like the stripe on the sleeve on the original book cover dress.  I did the best I could do with my kindergarten like art program to change the picture to more of how I want the dress.  So the bottom line, it is no longer an "exact copy."


I began my mock up by setting up my dress form with my corset at the desired waist size, my TV bustle and my TV skirt from another costume so I could get an idea where things would fall.  I cut the bodice pattern just a size larger than my usual pattern size so I could get a lot of adjustment.  I already know that my bust-waist ratio requires extra fiddling with patterns and that I am short waisted so that requires some adjustment as well.

I cut the TV pattern without the back folds since this pattern appears to stop at the waist.  I will also add hooks and eyes at the waist to keep the skirt joined with the bodice.  Here are photos of the mock up at stage one....big and loosly pinned with only some beginning adjustments, note dart at bust:


09/18/12
I've never attempted to replicate a dress from a book, fashion plate, or photo.  Now for a Guild holiday tea in December I've decided on another bustled dress.  I love bustled fashions and now that I've done the 1870s I'm excited about a new bustle project.

I already made the Truly Victorian bustle, a simple wonderful project that I used industrial tie straps instead of steel for the boning with great success.  I will also use the 1870s underskirt pattern as a base, rather than buy an 1880s pattern, and the 1884 French vest pattern as a base for the top.  Here are the Truly Victorian patterns: 


The dress that I will try for is on the cover of  "Victorian and Edwardian Fashions from 'La Mode Illustre."  Many costumers have this in their collection, I believe it was a Dover publication which was readily available a few years ago:


Here is a close up of the dress:


I decided on trying a blue dress after I scored two beautiful panels of jewel tone blue cotton velvet and wanted to do something "wintery."  I have looked for a really long time for the right contrasting fabric and haven't found anything with the dark print on the red background.  However, I have found a red with a gold weave. It would be 100% match to the picture but it will be close.  I will have to construct the striped fabric from the two fabrics I use.  I don't plan to use a third printed blue fabric, and will use the solid blue velvet throughout.  The dress, I believe, is not made from velvet but I thought would look really pretty, and make such a good winter dress in the heavier materials.  There are no pictures of the other side of the dress so I'm not quite sure how I will drape the striped portion, but I have time to figure it out.  I will also have to add lapels to the Truly Victorian pattern if I am to simulate this dress.  I'm not in a great hurry ot work on this, my home hasn't quite recovered from sewing three projects in a row...lots of pins and bits randomly around, but the tea is December 29th and I will be doing mock ups first. I will post as I go on this one.

Friday, September 14, 2012

Something Really Different for Me...

This past summer there was a "Spirit of '45" event celebrating WWII vets and history.  Living history military enthusiasts set up camp, a big band played and the "Andrew Sisters" sang.  I ventured out to connect with others from my costumer's guild...but this is not a time period I ever dress for so it was an adventure into something new.

First I spent a bit of time looking at old photographs and fashion photos on Google.  Then a few 1940's hair tutorials on youtube.  One of the best was a young African American woman putting her hair up in an updo.  My hair is really really curly and gets really nappy and isn't conducive to some sleek period hair without a lot of ironing and fussing with.  Then off to my closet -- this was a study in successive approximation.  I looked for things that had the flavor of the 40s....a pencil skirt, a white ruffled work shirt, my salsa dancing shoes. Then off to the vintage stash, gloves and purse.  Some basic pearl earrings and bright lipstick....alas no seamed hose, sometimes I have them in the hose drawer and sometimes not....this time...no go.

So I threw this together the best I could and here is a photo:

I was lucky enough to be offered a photo in this wonderful car!  Wish it was mine!!


Here is another beautiful car I wouldn't mind driving.

Saturday, September 8, 2012

The Evil Yellow Dress in Action

The Guild had a lovely picnic at the end of August at the Fallon House.  A beautifully restored old home in downtown.  A guided tour shared the history of the family and the ultimate tawdry divorce of the owners of the house.  Complete with a trial for slander....but I digress.  The dress was amazingly cool and comfy -- apparently there really is something practical to the sheer summer dress.  There were beautiful dresses everywhere, kudos to everyone.

I basted the top to the skirt but will need to redo it because the fit was too "poofy" in front.  I didn't take my time to fit the dress on me before I wore it...scary to go to an event without an "on the body fitting" but I ran out of time and honestly was so disengaged from this project that I just didn't bother.

Here are photos:


Wednesday, August 22, 2012

A Bustle Project Not Yet Shared...

Spring/early summer I finally got around to sewing an 1870s bustle project.  I haven't posted about it yet but I've worn it to two events, adding to the skirt and tailoring for a better fit for the second event.  Here are some photos and I'll share the process soon....


Above was the first outing.  Note how the waist looks different than the pictures below.  The weight of the bustled material pulled the back away from my body because I did not have the fit as snug as it needed to be.  I also then added another row of pleating at the bottom (see below).

Below you can see the better fit around the waist and back.  With the more correct tailoring I was able to achieve the more accurate curve between bustle and back.


I still am learning how to get a good fit in the shoulders/bosom area.   I was able to get the top fitted semi-well, especially considering I was struggling with keeping lines as matched as possible.  However there is still a bit of gap when I sit in the front shoulder upper bust area.  I also messed up by not putting a dust ruffle on and damaged the fabric underneath in some areas.  Hopefully the fray issue will not be too bad and I will go back and add that before I wear this outside again.


"oh my Sir.....you ARE being cheeky...."


This costume grew from plaid material that I had in my fabric stash for years.  I purchased 10 yards of textured lightweight upholstery silk from Ebay back when you really could get amazing deals and people didn't have their primary business online.  I think the whole thing cost $30 plus another $10 for shipping...how could I go wrong.  I then set it aside waiting for a "perfect" project but really more afraid of having to match plaid material was the reason nothing ever came of it.  The years past and my sewing skills improved and I decided to give this a go.  The pattern, another amazing Truly Victorian pattern was really quite simple.  Getting everything to line up was not.  There was a lot of fiddling and faddling to get things lined up, and given some of the extreme curvature on the bodice, some lines were just not going to line up.  In the end the sleeves went together well with the bodice and even the bustle has good connections with the front of the polonaise.  I worked yards and yards of trim -- pinning and folding while watching Netflix.  On a side note, I seem to go through a lot of streaming when I sew...I should start tracking what it is I watch when I sew....lol.

Below are construction photos.  Even with a very accurate form I had to make the corrections the second time I wore the outfit (as discussed above).  The Victorian bodice draping class offered by the GBACG has also been a great tool in creating these outfits....and for this project it was no different.


Getting the darts to fit my figured meant diverging from the pattern's directions and darts.  They were a good starting point but I had to do a lot of adjusting to make this work.

I was able to get a decent pattern flow of the plaid, but it some places (back) it wasn't going to match no matter what because of the extreme curvature of the pattern (and body).


Here is another view of the back (excuse the peplum not being smoothed out) where you can see that the matching success ended with the back....

Here is the polonaise before the bustle was stitched to the tapes and the tight fit of the bodice achieved. Also before the skirt was embellished.


Yards and yards of pleated trim.  The underskirt and the trim were made of inexpensive acetate taffeta as there was no budget for anything else.  I used a serger to bind one edge which made it easier to deal with.  On the skirt I used an old technique on the underside of the pleats to baste them down so they don't get messy (lots and lots of handwork).

The green fancy gimp was a closeout at Jo-Anne's.  Clearanced out for .50 a yard from 5.99....got to love that!!!  And there was just enough for this project.

The trim is a bit bulky at the closure but I used a brooch to keep the ends together.  Not idea but as this is a costume it was good enough.  Side note:  the buttons were a score at the discount fabric store.  $1 for shell buttons with a cast that complimented the light fabric.