And the story ended....
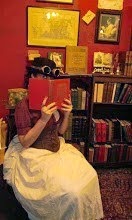
Finally finished if you count tacking things at the same time you are trying to get out the door. The even was glorious, the people amazingly draped, the setting just lovely--kind of felt like I was on a movie set.
Lots of things to go back and fix at a later date, but all in all I was pleased. Here are some photos:
(I didn't notice the crooked trim...ugh...thats what I get for tacking things on as I'm trying to get to the ball....)
Ok...I have no idea how far I am not but wherever I am it is not far enough.
Updates are:
Scored awesome shoes on ebay. Silk dupioni with a very good look to them, not of course totally period correct but the gist is there.
Also scored great glass pearl choker with a rhinestone detail in front, but no matter how I tried to photograph it -- it didn't work.
Basic dressed is 70% put together. I LOVE working with silk taffeta. I looked to see what retail would cost me and I was even more thankful to my friend who brought this back from Thailand. Now one of the biggest challenges was the fact that the fabric is only 40" wide. I had to change the cutting lines on the side panels. Thankfully I'm short and smaller so there was just enough with some left for trim. I am only using a panel for the under petticoat, since only a portion will show.
I also had to shorten the waist since I'm so short waisted. I had to make a draped mock up of the pattern piece then pin and sew all the crazy darts. I used that draped piece as a pattern and got a surprizingly good fit.
I am wondering if they will have AC...I really don't want to sweat in this thing.
Here is a pic of the pinned version:
and here are pics of the under part that the dress is built on (the blue, the green are undergarments), I was able to get a pretty good fit:
Day 1
Somewhere along the way I lost the momentum I had after the stays and underpinnings were completed. I've known for almost a year that in July the Costumer's Guild would be having an 18th Century salon.
I have no doubt that I will be sewing the night before for sure! I'm also seriously tight on money right now but remembered that I had 10 yards of silk taffeta that was brought from Thailand for me. It is this beautiful dark blue, like a deep deep blue sapphire. It has a wonderful texture, crisp and ten yards of fabric weigh almost nothing! I love silk. I've had it for the last 9 years tucked safely away for the perfect dress.
The pattern is one from JP Ryan: http://www.jpryan.com/ladiespatterns.html
Pattern is ordered and should show in a few days, I need blue cotton to flatline parts of the dress and that will be had at my favorite fabric store, Fabrics R Us for about $2/3 a yard.
I have no idea what I'll trim it with since I'm broke, but I'll figure it out.
Here are some dresses I really like and will use as inspiration. My fabric isn't patterned so I hope to do some really snazzy trim, but this is all a first attempt (which better be damn good bc I'm not going to be able to replace the material...lol).
Showing posts with label 1700's. Show all posts
Thursday, May 5, 2011
Wednesday, March 2, 2011
Fixing the Stays -- Might as Well Do This Right
Well, thinking I would just get away with my first attempt at the stays with the too long arm straps I was just about to sew them together when I decided to do it right. I undid the binding and cut down the straps and then redid the binding...argh! In the end it worked well enough and now it is done right. You can see the pics in the initial stays entry and the pics below.
Above are the after, below is the before:
Wednesday, February 16, 2011
18th Century Clothing: Pocket Hoops or Panniers, and undergarments -- Mardi Gras Costume
02/28/11
I've now got most of this complete. I used a Simplicity pattern for the chemise, although I completely redid the sleeve because I didn't want this gathered poofy thing going on. The petticoat was draped without a pattern. I took a look at several blogs and "how to get dressed in the 18th century" blogs and figured I could do without a pattern, and it worked out fabulously.
I will admit that everything is built out of five yards of cotton that was used as a Thanksgiving tablecloth. I figured eventually I'd use it to flatline something or make undergarments. I managed to work around a stain left by the gravy boat being knocked over by an inebriated guest, and since I'm short there was plenty of yardage to work with. The fabric had been washed, spot treated so it no longer smelled like turkey, and dried to get it to shrink a bit.
The following pic is a quick dry run. An update on the stays: I was able to make the stays smaller by overlapping the back and lacking it shut like that -- not correct but without doing that the stays were too big and didn't really cinch me in. The shoulder straps are also way way too long, but for now I'm going to sew them together--I think rather than redo the whole darn thing....maybe....we'll see. I have a great mask to wear which I will photograph later.
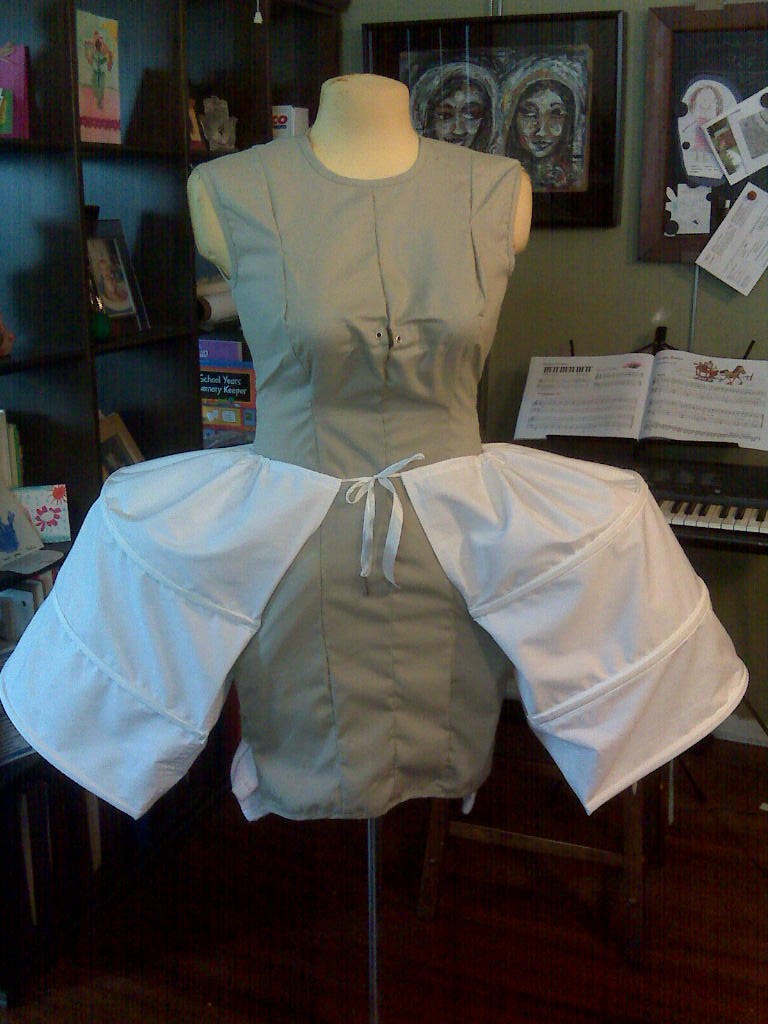
02/21/11 Pocket hoops are done, but not without a great deal of modification. I used the pattern provided in the link below, however, there were no instructions regarding scaling. As a person who is on the line of petite/average I found the pattern to be too long. So in the end I cut off 8" of the width of the two pieces, and more than 6" on the length.
I've been told that the first time you wear panniers they seem unnatural and that bigger/wider is better, however, for my frame the original pattern sized seemed unreasonably large. This will do for now.
I used the industrial zip ties again, this time finding a better deal in the plumbing department (25/36" heavy ties for $10). These seemed to be a bit heavier than the ones in the electrical department and I doubled them up in each casing (used 12 total). I think I'm ok with the finished product, and since I'm going for historical feel rather than accuracy they will do.
First Post: I will be going to a Mardi Gras costumed/masked party soon and want to wear a historical costume rather than anything scary or too revealing. I don't have time to sew a dress but I have the stays and can whip up a petticoat and chemise. However, I need the pocket hoops. I found a DIY site that I will try to replicate the hoops. I will not use steel for this one but rather the industrial zip ties, but probably two in each channel. Here is the link:
http://www.ferdalump.com/panniers.html
I've now got most of this complete. I used a Simplicity pattern for the chemise, although I completely redid the sleeve because I didn't want this gathered poofy thing going on. The petticoat was draped without a pattern. I took a look at several blogs and "how to get dressed in the 18th century" blogs and figured I could do without a pattern, and it worked out fabulously.
I will admit that everything is built out of five yards of cotton that was used as a Thanksgiving tablecloth. I figured eventually I'd use it to flatline something or make undergarments. I managed to work around a stain left by the gravy boat being knocked over by an inebriated guest, and since I'm short there was plenty of yardage to work with. The fabric had been washed, spot treated so it no longer smelled like turkey, and dried to get it to shrink a bit.
The following pic is a quick dry run. An update on the stays: I was able to make the stays smaller by overlapping the back and lacking it shut like that -- not correct but without doing that the stays were too big and didn't really cinch me in. The shoulder straps are also way way too long, but for now I'm going to sew them together--I think rather than redo the whole darn thing....maybe....we'll see. I have a great mask to wear which I will photograph later.
02/21/11 Pocket hoops are done, but not without a great deal of modification. I used the pattern provided in the link below, however, there were no instructions regarding scaling. As a person who is on the line of petite/average I found the pattern to be too long. So in the end I cut off 8" of the width of the two pieces, and more than 6" on the length.
I've been told that the first time you wear panniers they seem unnatural and that bigger/wider is better, however, for my frame the original pattern sized seemed unreasonably large. This will do for now.
I used the industrial zip ties again, this time finding a better deal in the plumbing department (25/36" heavy ties for $10). These seemed to be a bit heavier than the ones in the electrical department and I doubled them up in each casing (used 12 total). I think I'm ok with the finished product, and since I'm going for historical feel rather than accuracy they will do.
First Post: I will be going to a Mardi Gras costumed/masked party soon and want to wear a historical costume rather than anything scary or too revealing. I don't have time to sew a dress but I have the stays and can whip up a petticoat and chemise. However, I need the pocket hoops. I found a DIY site that I will try to replicate the hoops. I will not use steel for this one but rather the industrial zip ties, but probably two in each channel. Here is the link:
http://www.ferdalump.com/panniers.html
Sunday, January 30, 2011
18th Century Stays - Take One
AND NOW FOR THE FINAL...KIND OF FINAL ANYWAY....PRODUCT:
Well....turns out that making this one size smaller wasn't small enough to get the cinched in look I like. The next time will require me to make a bit of cusom alterations to whittle my waist more, at least another 1.5 inches smaller, the goal is 26", but if I cut the pattern size for that goal of a waist size the bust will be unwearable. I hate having to do the scaling to fit, but now I wonder if I should build a dress around this corset or just give it to a friend.
I will have to make some adjustments to one armpit as well but that should involve only some hand stiching. All in all I'm not displeased for a first attempt. Although the next one may just have a zipper in the front (saw this today at the GBACG open house and it was BRILLIANT!). As long as it looks period overall I'm not above some costuming tricks for comfort and easy access.
I may also use a metal busk next time, just to get the ramrod straight front piece. I think I will do another one of these for a pirate costume...one to be worn out rather than hidden. This could not have been possible without the grommet press...way better than hammering in all those puppies....and these projects eat up so many grommets, I thought by buying a gross (144) at a time I'd be ahead....not a chance...
I seriously need some sun on my arms....ach....
and a whole lot of tricep curls....ach again....
01/01/11 The two sides are almost done. I misjudged the amount of bias tape I needed and ran out. Of course nobody has any of that colour in stock so I am left with special ordering it. Twice as expensive but it will come to the house and I can save a gallon of gas. Now I have to decide what to do about the grommets/eyelets. Will post photos soon.
This was a test run with the heavy duty boning and multiple layers of fabric on my super cheapie machine -- whoo hoo! seems to work. Machine sewed through all the layers and didn't explode.
Step one -- all the pieces sewn together, you can see the poor fit/match of the pattern on the sides.....bla. This is with the back side in the center.
THE MARKING PEN FIASCO:
After spending more than two hours marking my pattern pieces with a special marker that disappears when water is spritzed on it I realized that apparently the purple markings decided to evaporate into thin air! What??!! Only to be horrified later that when I remarked everything now the marks don't really want to come off at all. Good thing this is a test garment and it is worn UNDER clothing because I'm ticked off now. Not really sure why this is all happening. Please feel free to share why my water soluble marker is evaporating into thin air then becoming somewhat permanent after I do a second application (even thought the first is gone).
I have half the corset boned. The heavy duty zip ties are working well. I borrowed the candle idea to sear the ends, i snip them into a "u" shape then heat them to soften any hard points. Seems to work. It all seems that one package (15/36" zip ties) will work out just fine.
AND SO IT BEGINS....
Day one of the project and I'm already thinking that maybe I should just save for a year or two and buy one....but I trudge on.
* Washed and dried the canvas. Turns out it is some sort of extraterrestrial material and required some serious ironing which really didn't get all the dents out but will work well enough.
* I completely regret my fashion fabric choice. Spent way too much time trying to get the front and rear to look good (forget matching up). I cut the sides completely randomly. I should have gone with a yard of cheap Dupioni.
* The pattern seems to be missing marking s which almost doesn't matter since several reviews have stated that one should consider boning the pattern altogether differently. The blogs also suggest cutting it one size smaller if you want it to cinch.
* I noticed that the lacing holes are not for spiral lacings which is period correct.
* I am (gasp) not making a mock-up this time. I'm just going to wing it and see how it turns out. The investment is not large at this point -- $20 worth of fabric and pattern.
* Since this is a first run I did not spend the money on spring steel boning. For $7.99 at Lowes I found a package of 15 - 36" heavy duty zip ties. So that is eight bucks for fifteen yards of boning. I'll invest in the good stuff if this is worth repeating.
The evil fabrics...
...Butterick Patterns of History.....maybe next time I'll get the J.P. Ryan pattern.
Day two of the project resulted in all the pieces being cut out and basted to the canvas. I was worried that my cheap machine wouldn't sew through all the layers but doing a test bit found the results to be satisfactory. I also test sewed some channels and treaded the boning through them. Again, it looks like it will work ok for this first attempt.
I decided that I will add more bones to the pattern. Reading various reviews it was suggested not to bone every horizontal channel because you get an odd rolling to the bodice. I will probably add a channel or two and then do every other one.
Update: apparently I bought a two pack of marking pens -- one water disappearing ink the other air....guess which one I used and ended up with the headache above....bla!
Well....turns out that making this one size smaller wasn't small enough to get the cinched in look I like. The next time will require me to make a bit of cusom alterations to whittle my waist more, at least another 1.5 inches smaller, the goal is 26", but if I cut the pattern size for that goal of a waist size the bust will be unwearable. I hate having to do the scaling to fit, but now I wonder if I should build a dress around this corset or just give it to a friend.
I will have to make some adjustments to one armpit as well but that should involve only some hand stiching. All in all I'm not displeased for a first attempt. Although the next one may just have a zipper in the front (saw this today at the GBACG open house and it was BRILLIANT!). As long as it looks period overall I'm not above some costuming tricks for comfort and easy access.
I may also use a metal busk next time, just to get the ramrod straight front piece. I think I will do another one of these for a pirate costume...one to be worn out rather than hidden. This could not have been possible without the grommet press...way better than hammering in all those puppies....and these projects eat up so many grommets, I thought by buying a gross (144) at a time I'd be ahead....not a chance...
I seriously need some sun on my arms....ach....
and a whole lot of tricep curls....ach again....
01/01/11 The two sides are almost done. I misjudged the amount of bias tape I needed and ran out. Of course nobody has any of that colour in stock so I am left with special ordering it. Twice as expensive but it will come to the house and I can save a gallon of gas. Now I have to decide what to do about the grommets/eyelets. Will post photos soon.
THE MARKING PEN FIASCO:
After spending more than two hours marking my pattern pieces with a special marker that disappears when water is spritzed on it I realized that apparently the purple markings decided to evaporate into thin air! What??!! Only to be horrified later that when I remarked everything now the marks don't really want to come off at all. Good thing this is a test garment and it is worn UNDER clothing because I'm ticked off now. Not really sure why this is all happening. Please feel free to share why my water soluble marker is evaporating into thin air then becoming somewhat permanent after I do a second application (even thought the first is gone).
I have half the corset boned. The heavy duty zip ties are working well. I borrowed the candle idea to sear the ends, i snip them into a "u" shape then heat them to soften any hard points. Seems to work. It all seems that one package (15/36" zip ties) will work out just fine.
AND SO IT BEGINS....
Day one of the project and I'm already thinking that maybe I should just save for a year or two and buy one....but I trudge on.
* Washed and dried the canvas. Turns out it is some sort of extraterrestrial material and required some serious ironing which really didn't get all the dents out but will work well enough.
* I completely regret my fashion fabric choice. Spent way too much time trying to get the front and rear to look good (forget matching up). I cut the sides completely randomly. I should have gone with a yard of cheap Dupioni.
* The pattern seems to be missing marking s which almost doesn't matter since several reviews have stated that one should consider boning the pattern altogether differently. The blogs also suggest cutting it one size smaller if you want it to cinch.
* I noticed that the lacing holes are not for spiral lacings which is period correct.
* I am (gasp) not making a mock-up this time. I'm just going to wing it and see how it turns out. The investment is not large at this point -- $20 worth of fabric and pattern.
* Since this is a first run I did not spend the money on spring steel boning. For $7.99 at Lowes I found a package of 15 - 36" heavy duty zip ties. So that is eight bucks for fifteen yards of boning. I'll invest in the good stuff if this is worth repeating.
The evil fabrics...
...Butterick Patterns of History.....maybe next time I'll get the J.P. Ryan pattern.
Day two of the project resulted in all the pieces being cut out and basted to the canvas. I was worried that my cheap machine wouldn't sew through all the layers but doing a test bit found the results to be satisfactory. I also test sewed some channels and treaded the boning through them. Again, it looks like it will work ok for this first attempt.
I decided that I will add more bones to the pattern. Reading various reviews it was suggested not to bone every horizontal channel because you get an odd rolling to the bodice. I will probably add a channel or two and then do every other one.
Update: apparently I bought a two pack of marking pens -- one water disappearing ink the other air....guess which one I used and ended up with the headache above....bla!
Subscribe to:
Posts (Atom)