Friday, December 28, 2012
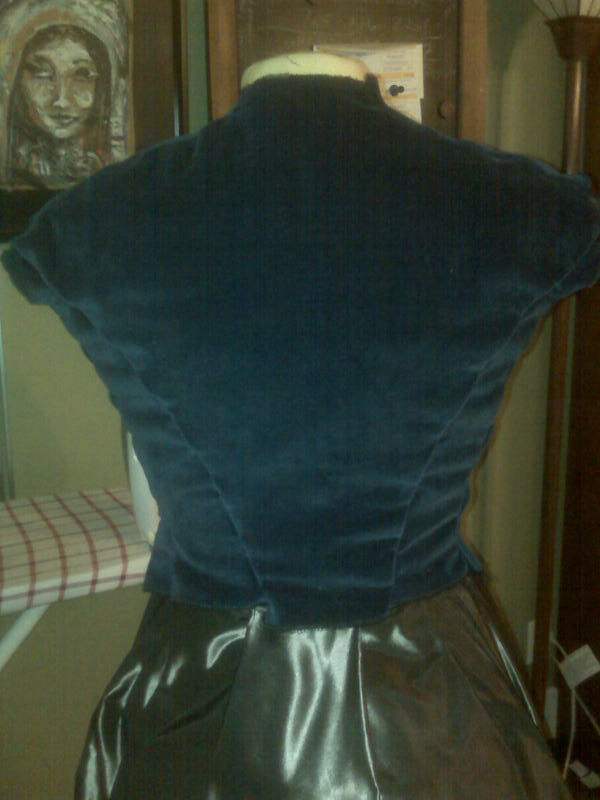
1880s Book Dress - Up to all hours and still no sleeves.
I have never had such problems setting sleeves. My hypotheses is that the combination of the lack of my tailoring skills, the amount of augmentation to the original pattern and my fabric have been the trifecta of problems keeping me from finishing.
I cut finished and tried to set both sleeves yesterday (or rather early this morning). I basted it all in only to stand back and see the horror of it all. Ug...I took a pic but don't want to post it quite yet. There was just way too much material in the cap, and I don't know how to reduce that problem easily.
I am tackling this by using the curvature of another pattern which I do like. I'm not cutting anything yet but I'll inset the sleeves and see what happens. Right now it is about just getting it all done enough. Tea is tomorrow.....no sleeves, no hem, no hat....ugh.
Wednesday, December 26, 2012
1880s Book Dress - 19 Bad Button Holes and Buttons


I may not yet have sleeves, but I have 19 poorly done button holes and 19 hand sewn buttons. I have no clue whether this will be easy to put on, I need to baste the lapels down and do something about a fixture on the inside of the bottom point so it won't spread....but the collar is done after two tries, the lapels are in and although my button hole dohicky on my machine didn't want to work I was able to eek 19 bad button holes out of it. Unfortunately I spent a lot of time doing hand repair work....but they are DONE!
Tomorrow sleeves, 3/4 blue with the red trim on the cuff. I probably wont get to trim out the white lace on the collar and cuffs, but the skirt needs to be tacked together and sometime in the next 48 ish hours a hat has to be made as well....all that comes to mind are expletives... I will do a mock up of a sleeve then the one go I will be able to make since there is barely enough fabric for the sleeves.
...and then if I get up on 6 am on Saturday to sew I may get this done.
Sunday, December 23, 2012
1880s Book Dress -- Sheer and Utter Panic
I have no photos at this time but can tell you that after getting "go to the hospital" kind of ill, I am way behind in my sewing. Fitting problems, fabric problems, marks I can't get rid of, and sleeves I haven't begun to set let alone 20 or sew buttons that are not close to being button-holed....and we are five days away from showtime.
If ever I wish there were Cinderella like fairies who could come and finish me a pretty pretty gown now is the time to be wishing hard. I have a backup but I've worn it a few times and this was supposed to be "the Tea gown." I am thinking that the rest of this will be quick and dirty - the bodice inside is ugly and a mess. Jr. High home EC class would give me failing grades for workmanship...but it's only costume...right?
Monday, December 17, 2012
1880s Book Dress - fitting fitting fitting...love/hate project.


I am having a really hard time getting a good fit. Usually when I use my manikin, which is foam and set up to fit me, I get a good fit. This time this was not the case. Trying the top on mid way after what I thought was an excellent fit resulted in a lot of time-sucking seam ripping and refitting. It the above photos the yellow pins show you where I had to redo seams. Of course redoing seams on this kind of fabrics is unforgiving...marks will remain...and I continue chanting "it's just a costume...it's just a costume."
The sleeves are going to be a really big problem. I deduced from this project that I need to take a tailoring class. All the adjusting to fit the the pattern to my bust has moved the armholes, in my zeal to adjust them to be able to try the top on I butchered the openings. No more fabric, no redo....sigh.
And of course, the curse that is my poor time management will mean that although I started this project with plenty of time to spare I will most likely be sewing up to the last minute. Have to work on this too...sew faster...sew faster...
Saturday, December 15, 2012
Fixing the Quick and Dirty Steampunk Corselet


In October (you can see previous post) I made a Steampunk costume in five days. This included using a terrible Simplicity pattern to make a corselet that was a complete and utter headache. The pattern itself was super easy, but scaled horribly. I cut it out several sizes too small -- correlating with my desired cinched waist size and the mock up was way too big. Even after I cut down the pattern a great deal I could cinch the darn thing all the way closed with room to go.
I also didn't have on hand an appropriate closure or the really cool metal closures I found on Ebay. As I'm short waisted and wanted an antiqued gold busk I had to order one from a Canadian seller on Etsy because I couldn't find a short enough one anywhere else. Price and shipping were excellent. I also didn't have any coutil and although I lined the pleather with heavy cotton duct fabric there is still give....I'm going to break down and buy some coutil yardage and put it away for when I get suddenly inspired to sew.
I ripped apart the front of the corset where I used hooks and eyes, and then took out about three inches of front material. I inserted the busk, then added the heavy closures which are cosmetic only. Much happier with the whole project.
 | |
| The "quick and dirty" much too large, horrible front corselet. |
 | |
| The cut down version. Note where the front bones are compared to the picture above. I could have used this a bit smaller but there was not really anywhere easy to remove additional fabric without deconstructing the whole thing. Unfortunately I didn't have coutil so there is a bit of stretch with the pleather which could have been avoided with the coutil as a backing. |
 |
| Here you see a busk in the wrapper and the other busk partially inserted into the corselet. The side with the nibs still needs to be folded over and sewn. An awl is really helpful when putting together corsets. I bought mine at HomeDepot for just a few bucks. |
 |
| Here is the corselet before I put on the decorative hardware. You can see there is quite a difference between the front bones in this version and the previous. I don't care how big your hooks and eyes are there is nothing like having a proper busk closure to hold you in and allow for significant lacing. If you have never put one in, don't stress, it is actually much easier than you thing. I was originally quite intimidated before I inserted my first busk of this type. |
Wednesday, December 5, 2012
Book Dress - Sewing Striped Fabric
 |
| Pinned to get the gist....not sewn. |
Woo hoo!..I eeked out enough fabric to make the striped panel, although ideally it would have been the other way, three red, and four blue, having the blue on the outer edges as it is in the book plate. The front blue panel is also not as full as I would have liked but at least I made it....with small scraps of blue left that I may make a ballgown bodice that I will trim with bits of blue (flowers? bows?).
Sewing the striped fabric was actually a lot more work that I thought it would be. Marking it all out, then making sure when I sewed it that everything was pointing in the right direction. The velvet has a nap and the red photo has a oriented pattern that had to all face in the same direction. I serged the pieces together than steam ironed the dickens out of the panel. While I was sewing the fabric got wanky despite my pinning it so it would not move and I got "stretch" on the red woven fabric. I had to really hit the finished piece with a mister and hot iron...not ideal and not great for the velvet but it was the only thing that was going to flatten it all out. The stripes are not really that squared or straight but you can't tell when it is all draped.
Here is the fabric spaghetti that became the panel:


Monday, December 3, 2012
1880s Book Dress -- Fabric Crisis!!!
I have hit the dreaded "oh no!" point (actually this initially included an expletive, but I'm trying to keep this a family show...) today. I have a finite amount of blue velvet fabric. I thought that it would be enough forgetting that bustled gowns take oodles of fabric when you factor in draping and whatnot....
No amount of fiddling or faddling will fix this. There is no more fabric to go back and get. I am short on material and no fabric stretching trick will fix this. I underestimated the amount of fabric to do the front overskirt swag. Which leaves me with significantly less fabric to make the red and blue striped panel to go over the bustle. I thought I could just "whip up the skirt" easily but now with the lack of fabric this has become much more challenging. Big sad smiley face! :-(

Saturday, December 1, 2012
1880s Book Dress - VII BUTTONS!
This post is about buttons...or could be called "why I love Ebay..."
I've found several sources for fabulous historical-like buttons. Ok, maybe they aren't period correct but they look so pretty and are downright cheap when compared to running to the fabric store for carded buttons. I am taking creative license in choosing the buttons for the Book Dress top. Most likely based on the photo the front closed with hooks and eyes. It doesn't look like they used buttons. I bought 24 - two sets of 12 because I want to put a zillion tiny buttons down the front because that makes me happy!

Sunday, November 25, 2012
1880s Book Dress - VI: Working on the Skirt
I realized that in order to get the best fit on the top of the dress I really need to have the skirt done. I started the skirt and then got sidetracked on a waist cincher I'm redoing but here is skirt progress:
What shape I wanted, first with the original book dress photo:


Then there is a piece I own that one day I will recreate (totally not wearable, shreds when you touch it):

To get the look I used a Truly Victorian pattern for an 1870s skirt with multiple pieces/seams:

 |
| This is the front portion of the skirt and the side fronts cut as one piece. |
 |
| I barley had enough room but managed to get the back and side backs onto one piece of fabric. Again I added length to the back piece as well. |
To get a more pronounced 1880s bustle I've decided to use a wire cage that I own. It was a back room vintage store find and was very inexpensive years ago. The downside is that it was never in good shape and I didn't take good care of it over several moves and it is in pretty bla shape...one day I'll do it right but right now it is a disaster. I know people have varying opinions on whether to wear original pieces but I plan to and hope for the best.
I had previously sewn the TV bustle which I made up without the additional ruffles. I layered this over the bustle cage and got a really good shape for the dress. Now I haven't yet tested this out for wearability, and since this will be a tea with a lot of sitting, I hope this works...(crossing fingers).


When I tacked all the pieces on this is what it looks like. Nothing is sewn but you get the gist:


Monday, November 19, 2012
1880s Book Dress - V: Getting Pinned Together
Well, I think my fabric choices were a mistake. Got to love the learning curve. I love the jewel tone of the blue cotton velvet, a bargain clearance purchase. I bought a contrasting fabric that has the flavour of the Book Cover Dress. I was unable to find an affordable print that would match exactly. I did find, online, super lux fabric that would have worked but no way would I ever be willing to spend $100/yard on fabric. So back to the discount fabric store back room. here is what I bought and a snapshot of the Book Cover Dress:


I cut out the pieces to the bodice and flatlined all the blue with a heavy black muslin, and the vest pieces I cut two pieces of fashion fabric and stiff tightly woven cotton between the two. The blue/black combo were serged and the print required me to sew the stiffener in. Now I realize that my seams are going to be quite bulky....arrrrrgh....I will deal, it is a costume not clothing reproduced.


Then I started pinning together...the following picks are just pinned not sewn -- I am pleased with the reduction of the vest pieces:


I will need to unpin the bottom sides of the top to allow for the bulk in the skirt and draping...we'll see how that goes...
I tried to match the pattern but the vest pieces were so curved it wasn't going to happen past a mid point:


Saturday, November 17, 2012
1880's Book Dress - A Better Fit
I am getting closer to a good fit. I have previously referred to a Victorian Bodice Class I took through the Greater Bay Area Costumer's Guild and how much it helped me understand how to get a good fit. I recut the vest pattern piece and the second piece of the front to get the proportions wanted. I still have to add the lapels which I have to draft in and figure how to add them without adding too much bulk to the seams as I am using heavier weight materials. I also am thinking that I will need to add spiral boning although I had not intended to.
I plan to flatlne the velvet with pretty heavy canvas and most likely will not add a lining - because I make costumes and not clothing -- and frankly I'm running out of time.
Below is a before and after pic of the pattern pieces. The disclaimer here is that I am hard to fit and it is not the Truly Victorian pattern that is so out of wack. I purposely cut the front sections a size bigger because of my bust to waist ratio. The back piece and two piece sides required little adjustment.


 | ||
| I like the proportions of the vest much better now than before (see photo below) |
 |
| Red lines were the original seam lines and the green is where I wanted the seam. |

Wednesday, November 14, 2012
BOW TIES!
I had a fair trade request when I was asked to make bow ties in exchange for a service I needed. I jumped at the chance. How difficult could bow ties be? Well...they are not difficult but I learned that the bias cut requires quite a bit of fabric.
I started by using this free pattern I found online:
http://www.angelaosborn.com.au/diy-bow-tie-free-pattern/
Here is her example of a finished tie:

Totally awesome pattern. I had to enlarge it 118% to make it scale, but that was the magic number to get exactly the right measurements. The author provided a box with what it should measure and it took a few tries to get it right.
They were an easy sewing project but more time consuming than I expected because of the hand stitching to close the tie. A pointy chopstick is absolutely nenecessary for successful inside-outing, and getting the bow tie corners as pointy as you can.
I ended up sewing three sets, and had enough material to make matching pocket squares. It was fun!


Saturday, November 10, 2012
1880s Book Dress - Part III Mock Up Cont.
The mocking up of the bodice is going slowly. I did not like the center panel being as wide as the pattern calls for. On my frame the spread from center bust to center bust seems too wide to me especially as compared with the dress picture. I am going to have to figure out how to reduce the width and keep the integrity of the bodice.
I'm also trying to figure how to get the right curvature of the point. I tried to figure a mathematical scale that would best result in the length of the point. I still think the tip is too long in front and the curve is not pleasing...I will have to...in highly technical terms...do more fiddling....


 | |
| The red lines are the pattern seams, the green where I would like the vest seams to be. |
Subscribe to:
Posts (Atom)