I am on my way to starting a big re-do project on a 1920s evening gown that is a disaster, so before I get knee deep in that I thought I'd get these photos up. Here is the inspiration:
This pattern is available for free online here:
http://www.tudorlinks.com/treasury/freepatterns/pe187707wbalayskirt.html. The pattern is also sold on Ebay, but I'm not sure if it is sold by the person holding this site or others.
A balayeuse was used/attached under skirts to keep them cleaner, they would be detached then washed then reattached. I have seen costumers use velcro, snaps and buttons to do this. I made an entire petticoat using salvaged poly and poly/cotton fabrics I had laying around. In fact the entire thing started as a bridal gown petticoat, big round and POOOOFY. I cut out the net which I reused and recut the material I had based on the pattern for the above skirt. I added reclaimed trim as well. It came together well but did require some fiddling. I also added hip pads to get a more rounder look. So two big mistakes: I didn't prewash the material and when I machine washed the whole thing it shrank a bit, but not enough to ruin it. Then when I went to my event and had to do some more tweaking I pinned the balayeuse to the underside of the dress...bad bad moved, had huge rips in the balayeuse by the time I got home...the next time I wore it I pinned to the ruffle, all was good.

Here you can see the yards of fabric that go into the skirt, the pattern is SUPER easy, and I was able to pull out the fabric from the old wedding dress petticoat. Here you can see I was placing the net from the old dress, kind of rolled up to get an idea where placement should be (above).
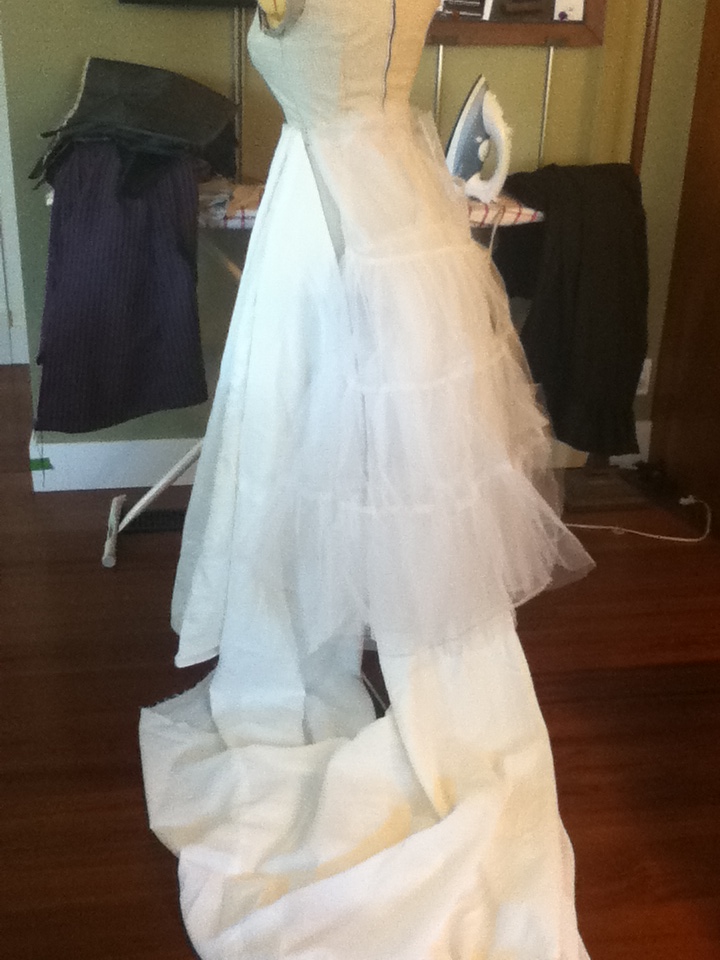
I then realized that it would be uncomfortable with all that net so I added a piece of fabric that would be a barrier between and also another lower pouf of net (a 70's veil kept in the stash for the net). The fabric will be tacked into the back of skirt at the opening. Notice the center pleat at the waist that will allow for getting in and out of skirt. (above)
I added a little "oomph" to the hips using quilting fleece. I used four pieces but graded three of them to reduce bulk at the waist and the top of the hip. I measured informally, choosing dimensions that were pleasing to me. I sewed these into the waistband and they remain part of the petticoat (above).
The fabric pieces came together but it was the fact that I've read a number of articles and blogs that I realized that I would have to run a casing and drawstrings to get the gathers I wanted. This was a must and then additional there would need to be ties on the underside of the petticoat (below).
The top portion I ended up gathering with a needle and thread and the lower portion was done with a casing that had ends that hung out and tied (above).
I hemmed the front rather short so it would not drag and I was adding a washable pleated trim (above).
I used a poly-cotton to do the pleating, because it seems to hold a pleat better once I've steamed the beegeberz out of it. I eyeballed the pleats, something I've gotten good at over time, and used the lines on the iron cover to keep the edges parallel-ish (above). When I attached the pleats I basted them on UNDER the skirt hem. I've read several blogs discussing that this is the more correct way to do this in this application. I then was able to control the length of the pleat without having to figure out where to taper it -- I just made one width and adjusted by basting it higher or lower (below).
I then added some stash trim which came off the previously mentioned wedding veil:
However, here is the sad ending to this lovely outcome (previously mentioned bad judgment of fabric strength):
One day I will fix this...one day...sigh...


.JPG)
No comments:
Post a Comment