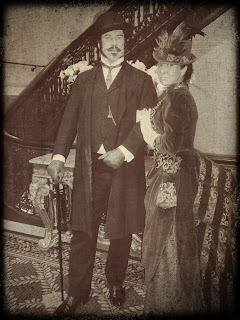
I haven't posted in a while because I got bogged down with life which impeded my sewing, then I stagnated...my fault entirely. I'm trying to get motivated. So many projects and so little time -- or in another way, tickets to the ball in hand and no dress...sigh.
Months ago I worked on the Book Cover Dress and literally at the last minute crafted a hat. I called that project my "quick 'n dirty" project because it is pure theater, very little craftsmanship and lots of hot glue. Now since I do costumes and do not reproduce clothing, I was happy with the outcome which at least on the outside was fab. Here is the breakdown of the cost:
$3.99 Thrift store fedora, new with the tag still on it.
$1.50 Small bit of discount fabric store fabric
$0 Feathers from the stash.
$0 Ribbon from the stash
$0 Duct tape, hot glue/gun, and all the bits to put it together (already in hand).
Total: aprox. $5.50 - not bad when starting with a four dollar thrift store hat.
THE GOAL:
Tall and fabulous!
THE PROCESS:
 |
| First I began by using a sharpie and marking the hat, estimating where I wanted the slope and giving me a line to cut out the front portion because the angle was not good for a Victorian-ish reproduction. |
 |
| Here you can see the slope I decided on. |
 |
|
|
|
|
|
|
|
|
|
|
|
|
|
 |
| I then added strips of duct tape both horizontally and perpendicularly to shape the slope that I wanted. I don't have a picture of the next steps in which I took a round piece of cardboard and hot glued it on the top to give me a flat hard surface to work with and to make sure I didn't have sag on the hat top. I then had a long rectangular piece of fabric which I eased and pleated around the brim. This was folded to cover the lower brim and tucked into the inside top of hat. On the outside I snipped tabs to lay flat on the side of the hat body. once that was pinned, glued, and tacked with a needle and thread I covered the round top with fabric which had tabs hanging over the edge. Finally I used a rectangular piece of fabric with the edges folded over and ran it around the had body. I sewed the top edge with a needle and thread but hot glued the lower and back seam. Then I played for a while trimming the hat out with stuff I already had and using pictures of 1880s hats as guides. |

Although not perfect it worked with the outfit. I'm not thrilled that the peacock feathers decided to lean opposite the other feathers. I probably will fix that before the next time I wear the hat. One day when I have time (hear hysterical laughter in the background) I may make a real hat.
 |
| I had been horribly ill right before this event, and apparently it showed, I really do have lips..lol. I am not normally this pale although for some costuming I wish I was. Enjoy the Duct Tape Hat... |
|


No comments:
Post a Comment