Sunday, November 25, 2012

1880s Book Dress - VI: Working on the Skirt


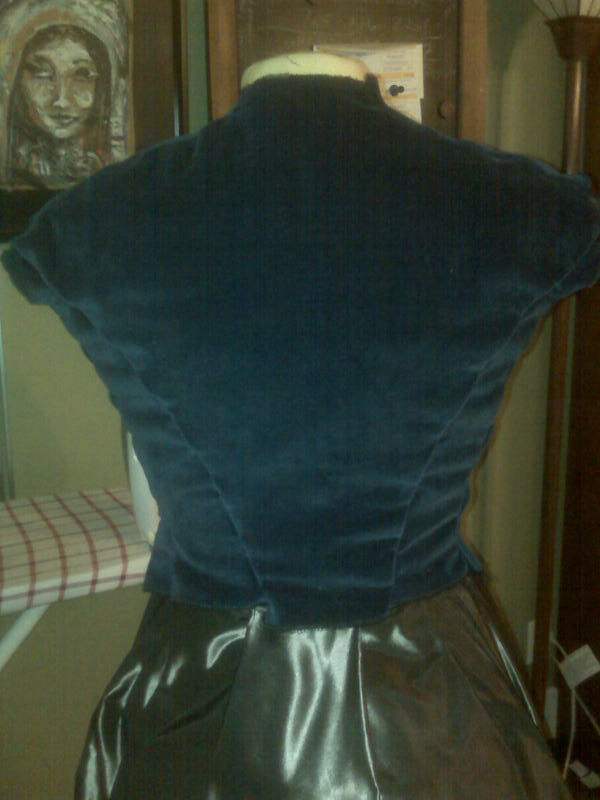
I realized that in order to get the best fit on the top of the dress I really need to have the skirt done.  I started the skirt and then got sidetracked on a waist cincher I'm redoing but here is skirt progress:

What shape I wanted, first with the original book dress photo:
Then with a good example of the real deal:
In a way this is very near to the book dress if you look at the styling and close to what I am shooting for. 
Then there is a piece I own that one day I will recreate (totally not wearable, shreds when you touch it):

To get the look I used a Truly Victorian pattern for an 1870s skirt with multiple pieces/seams:
What I did instead was to lay the pieces out so I would have the front contrast fabric cut in one piece and the back and sides cut in one piece resulting in just two seams.  I was lucky that my blue cotton velvet is very wide and allowed me to cut the larger piece on the fold in once piece.  Importantly  I added a couple of inches to the bottom to make sure the length would be long enough.  TV patterns sometimes run short, and I wanted to make sure I had plenty to run over a bustle.  The tricky part will be draping and adding a hidden pocket because I only have two seams to work with:
This is the front portion of the skirt and the side fronts cut as one piece.
I barley had enough room but managed to get the back and side backs onto one piece of fabric.  Again I added length to the back piece as well.

To get a more pronounced 1880s bustle I've decided to use a wire cage that I own.  It was a back room vintage store find and was very inexpensive years ago.  The downside is that it was never in good shape and I didn't take good care of it over several moves and it is in pretty bla shape...one day I'll do it right but right now it is a disaster.  I know people have varying opinions on whether to wear original pieces but I plan to and hope for the best.

I had previously sewn the TV bustle which I made up without the additional ruffles.  I layered this over the bustle cage and got a really good shape for the dress.  Now I haven't yet tested this out for wearability, and since this will be a tea with a lot of sitting, I hope this works...(crossing fingers).


When I tacked all the pieces on this is what it looks like.  Nothing is sewn but you get the gist:

I think the bottom of the dress will be less poofy in the front.  Right now the TV bustle/petticoat is tacked up because I wore it with and will be wearing it again soon, a Steampunk outfit and I needed it shorter.  When I let the tacking down it will be smoother in the front.


Monday, November 19, 2012

1880s Book Dress - V: Getting Pinned Together


Well, I think my fabric choices were a mistake.  Got to love the learning curve.  I love the jewel tone of the blue cotton velvet, a bargain clearance purchase.  I bought a contrasting fabric that has the flavour of the Book Cover Dress.  I was unable to find an affordable print that would match exactly.  I did find, online, super lux fabric that would have worked but no way would I ever be willing to spend $100/yard on fabric.  So back to the discount fabric store back room.  here is what I bought and a snapshot of the Book Cover Dress:


I cut out the pieces to the bodice and flatlined all the blue with a heavy black muslin, and the vest pieces I cut two pieces of fashion fabric and stiff tightly woven cotton between the two. The blue/black combo were serged and the print required me to sew the stiffener in.   Now I realize that my seams are going to be quite bulky....arrrrrgh....I will deal, it is a costume not clothing reproduced.


Then I started pinning together...the following picks are just pinned not sewn -- I am pleased with the reduction of the vest pieces:


I will need to unpin the bottom sides of the top to allow for the bulk in the skirt and draping...we'll see how that goes...

I tried to match the pattern but the vest pieces were so curved it wasn't going to happen past a mid point:

Now I have to figure out how to add the lapels, which is going to add even more bulk to the vest seams...ugghh...apparently I'm really whiny tonight....sometimes well intentioned sewing projects are...well...fussy and irritating....Here is a picture of what I'm aiming for but not up and around the collar.  Since the Book Dress is kind of a side view this picture is a good guide:

Saturday, November 17, 2012

1880's Book Dress - A Better Fit


I am getting closer to a good fit.  I have previously referred to a Victorian Bodice Class I took through the Greater Bay Area Costumer's Guild and how much it helped me understand how to get a good fit.  I recut the vest pattern piece and the second piece of the front to get the proportions wanted.  I still have to add the lapels which I have to draft in and figure how to add them without adding too much bulk to the seams as I am using heavier weight materials. I also am thinking that I will need to add spiral boning although I had not intended to.

I plan to flatlne the velvet with pretty heavy canvas and most likely will not add a lining - because I make costumes and not clothing -- and frankly I'm running out of time.

Below is a before and after pic of the pattern pieces.  The disclaimer here is that I am hard to fit and it is not the Truly Victorian pattern that is so out of wack.  I purposely cut the front sections a size bigger because of my bust to waist ratio.  The back piece and two piece sides required little adjustment.


I like the proportions of the vest much better now than before (see photo below)

Red lines were the original seam lines and the green is where I wanted the seam.


Wednesday, November 14, 2012

BOW TIES!


I had a fair trade request when I was asked to make bow ties in exchange for a service I needed.  I jumped at the chance.  How difficult could bow ties be?  Well...they are not difficult but I learned that the bias cut requires quite a bit of fabric.

I started by using this free pattern I found online:

http://www.angelaosborn.com.au/diy-bow-tie-free-pattern/

Here is her example of a finished tie:


Totally awesome pattern.  I had to enlarge it 118% to make it scale, but that was the magic number to get exactly the right measurements.  The author provided a box with what it should measure and it took a few tries to get it right.

They were an easy sewing project but more time consuming than I expected because of the hand stitching to close the tie.  A pointy chopstick is absolutely nenecessary for successful inside-outing, and getting the bow tie corners as pointy as you can.

I ended up sewing three sets, and had enough material to make matching pocket squares.  It was fun!


Saturday, November 10, 2012

1880s Book Dress - Part III Mock Up Cont.


The mocking up of the bodice is going slowly.  I did not like the center panel being as wide as the pattern calls for.  On my frame the spread from center bust to center bust seems too wide to me especially as compared with the dress picture.  I am going to have to figure out how to reduce the width and keep the integrity of the bodice.

I'm also trying to figure how to get the right curvature of the point.  I tried to figure a mathematical scale that would best result in the length of the point.  I still think the tip is too long in front and the curve is not pleasing...I will have to...in highly technical terms...do more fiddling....


The red lines are the pattern seams, the green where I would like the vest seams to be.


Friday, November 9, 2012

1880s Book Dress - Part II Mocking Up

Project Update:
11/08/12

I'm coming out of my sewing funk...I had fun with my five day steampunk project and now I'm sewing bow ties.  I've started the Book Dress with a mock up using the Truly Victorian bodice, but I've made changes to how I cut the pattern -- I will discuss that more below.

I made some changes in how I want the final product because I realized I really didn't like the stripe on the sleeve on the original book cover dress.  I did the best I could do with my kindergarten like art program to change the picture to more of how I want the dress.  So the bottom line, it is no longer an "exact copy."


I began my mock up by setting up my dress form with my corset at the desired waist size, my TV bustle and my TV skirt from another costume so I could get an idea where things would fall.  I cut the bodice pattern just a size larger than my usual pattern size so I could get a lot of adjustment.  I already know that my bust-waist ratio requires extra fiddling with patterns and that I am short waisted so that requires some adjustment as well.

I cut the TV pattern  mockup without the back folds since this pattern appears to stop at the waist.  I will also add hooks and eyes at the waist to keep the skirt joined with the bodice.  Here are photos of the mock up at stage one....big and loosly pinned with only some beginning adjustments, note dart at bust: